Tutorial to Create a Cloudflare Tunnel to Expose Self Hosted Application to Internet
Connect safely your self hosted application to the web!

In my previous post, “I Locally Deployed an Agent to Post about the Coolest Cars on Instagram”, I broke down how I built an autonomous system on a local Ubuntu machine. The setup uses an AI agent (OpenClaw) to scrape car auction data, evaluate fair track-car prices, and pass those posts to a self-hosted Postiz instance to automatically publish them to Instagram.
This brings up a classic developer dilemma: You are hosting a service on your own local machine, but you need to safely expose it to the internet. To make this workflow autonomous, my self-hosted Postiz instance has to communicate directly with Meta’s (Instagram) APIs. Meta requires a public, secure web address (HTTPS) to send and receive data. Usually, making a local machine visible to the outside world means messing with your home router settings (port forwarding) and exposing your home IP address—which is a massive security risk.
The solution? A Cloudflare Tunnel.

How I Created a Cloudflare Tunnel
Step 1: Delegate DNS Authority to Cloudflare
Before exposing any local infrastructure, Cloudflare must act as the authoritative DNS provider for your domain (yourdomain.com).
Add the Site: Log into the Cloudflare dashboard, select Add a Site, and input your root domain. Select the Free Plan tier at the bottom of the pricing matrix.
Scan and Sync: Allow the platform to scrape your existing DNS records automatically.
Update Nameservers: Copy the two assigned nameservers (e.g.,
ashley.ns.cloudflare.com) provided by Cloudflare. Navigate to your registrar’s portal, remove the default nameservers, and swap them with the Cloudflare pair.Propagation: While DNS changes can theoretically take up to 24 hours,
.comTLDs typically cut over almost instantly.
Step 2: Provision the Tunnel Connector via Docker Compose
Tunnels are managed exclusively inside the Cloudflare Zero Trust ecosystem rather than the standard DNS dashboard.
Initialize the Tunnel: Navigate to Networks > Tunnels, click Create a Tunnel, and select Cloudflared as your connector architecture.
Label the Asset: Assign a clean identifier, such as
Sunnyvale-Dev-Server.Containerize the Daemon: Cloudflare provides a unique authentication token to authenticate the connection. Instead of running a transient
docker runcommand via CLI, map the daemon directly into your microservices stack.
Add this service block to your deployment manifest to ensure persistent uptime:
services:
  tunnel:
    container_name: cloudflared-tunnel
    image: cloudflare/cloudflared:latest
    restart: always
    command: tunnel --no-autoupdate run --token ${TUNNEL_TOKEN}
Once the container spins up and establishes a secure outbound handshake via HTTP2/QUIC, the tunnel status will shift to a Healthy (Blue) state in the console.
Step 3: Define Public Hostnames and Service Routes
With the outbound mesh established, you must map your public subdomains directly to the internal isolated Docker network topology.
Expose the Endpoint: Inside your tunnel settings, navigate to the Public Hostname tab and select Add a public hostname.
Configure Routing Rules: Map your target subdomain directly to your container alias. Cloudflare terminates SSL encryption at the edge, meaning your local services remain unencrypted (HTTP) while the WAN observes a secure HTTPS transport layer.
Subdomain:
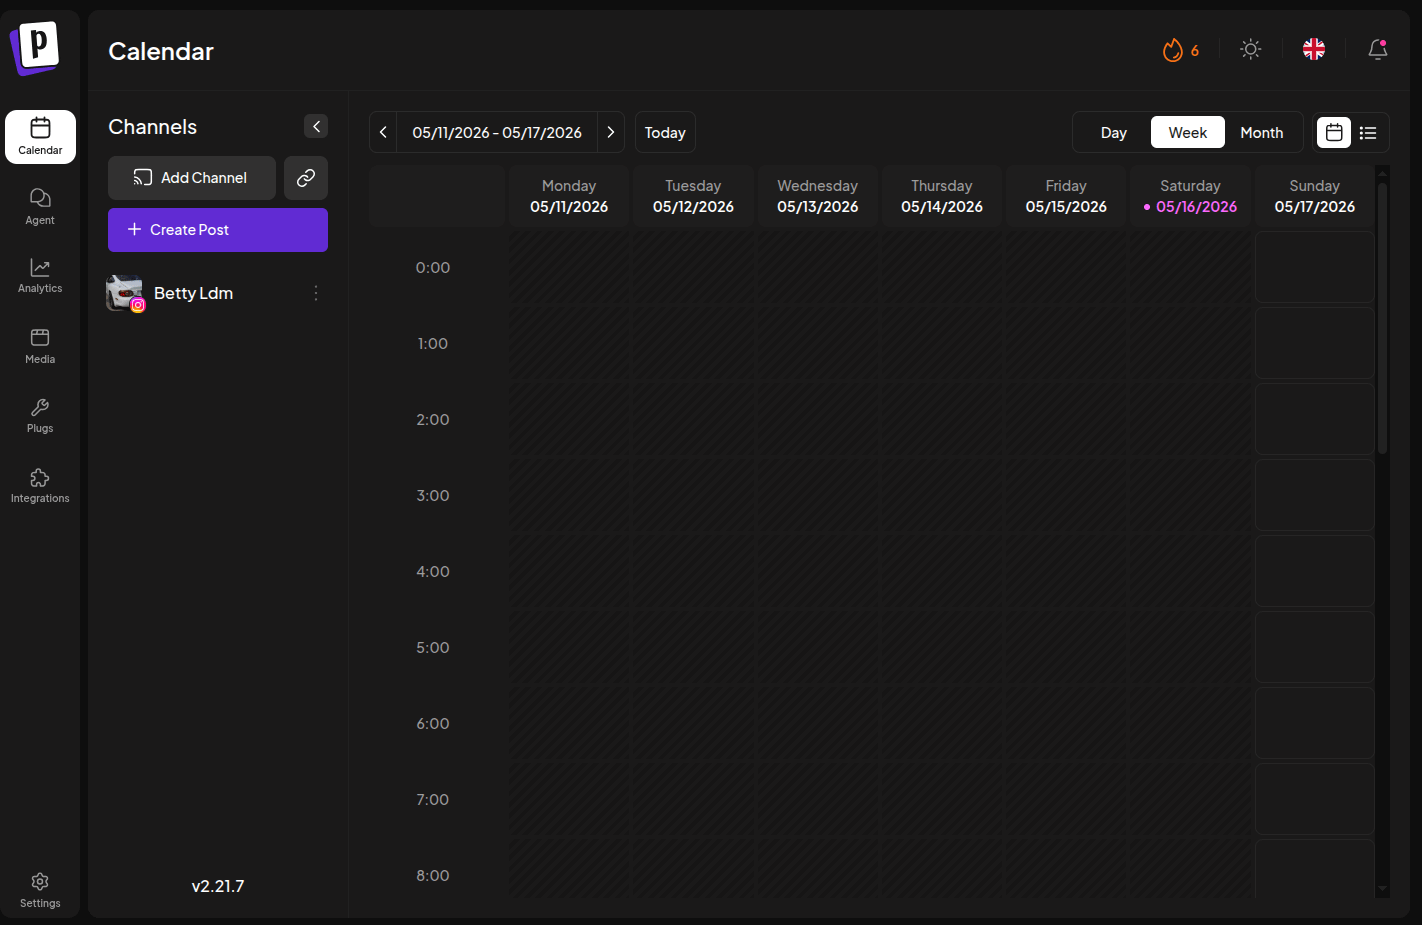
postizDomain:
yourdomain.comService Type:
HTTPURL:
postiz-app-container:3000(Utilize the internal service name and container port defined in your network mesh).
Step 4: Enforce the Zero Trust Access Wall
To prevent unauthorized traffic from hitting your administrative dashboard, you must wrap the exposed host in an edge authentication layer.
Create an Access Application: Navigate to Access > Applications > Add an Application and choose Self-hosted.
Set Target Domain: Point the application configuration explicitly to
postiz.yourdomain.com.Lock the Dashboard: Define a primary security policy where Action = Allow and Include = Emails, inputting your specific administrator email address. Users will be required to pass a one-time hardware key or PIN code to view the application layer.
Step 5: Implement the Meta API Bypass Policy
An ironclad security wall introduces an automation bottleneck: Meta’s external webhooks and OAuth handshakes cannot authenticate via an email verification prompt. To resolve this, you must construct an explicit routing exception.
Create a Parallel Rule: Within the same Access Application, define a secondary policy layer.
Configure the Exceptions: Set the rule Action = Bypass and isolate the specific ingress targets utilized by Instagram’s API integrations:
Include: Path is /integrations/social/instagramInclude: Path is /api/social/callback/instagram/webhook
Quick Troubleshooting for the Road
502 Bad Gateway (Destination Unreachable)
Cause: The
cloudflareddaemon is attempting to look uplocalhost:3000internally, butlocalhostinside a container isolates it from the target application service.Resolution: Ensure both containers share the same custom Docker network, then route traffic using the explicit container name (
postiz-app-container:3000) or bridge gateway IP.
OAuth State Mismatch / Login Loops
Cause: The edge identity policy is intercepting the asynchronous redirect handshake returning from Meta’s OAuth server, destroying the session token.
Resolution: Double-check that your Bypass paths match the exact API routes used by your application. Do not blanket-protect a root domain if headless third-party scripts require open endpoints.
SSL/TLS Handshake Failures
Cause: Cloudflare attempts an upstream origin connection over HTTPS, but the local development container is listening strictly on unencrypted HTTP.
Resolution: Keep your Service Type explicitly set to
HTTPinside the tunnel config, or toggle No TLS Verify toOnif you are forcing a local self-signed certificate.
With this bridge securely deployed, your local Ubuntu environment functions as a hardened, production-grade server—fully insulated from inbound network attacks, yet completely accessible to your autonomous AI agents.
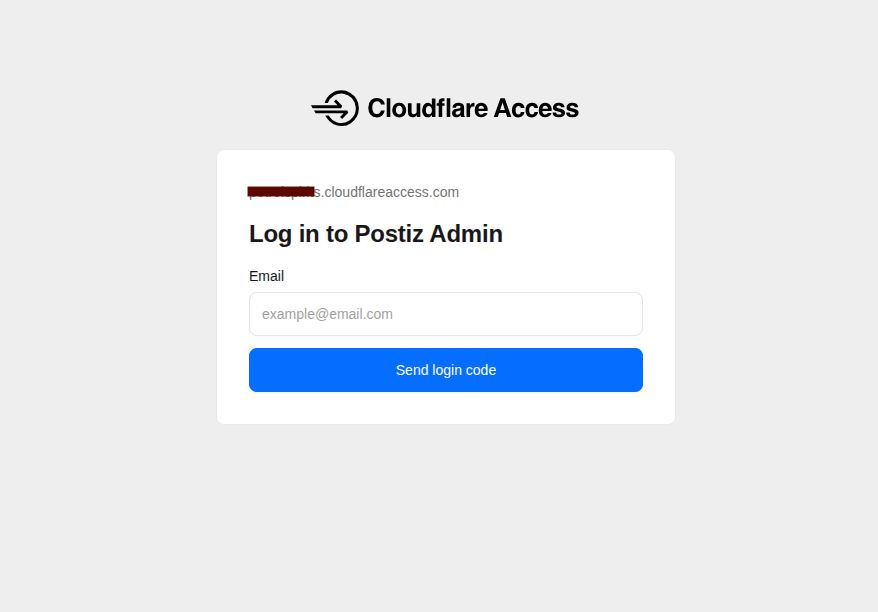
Once you enter your email adress on the portal, you receive a mail with the code.
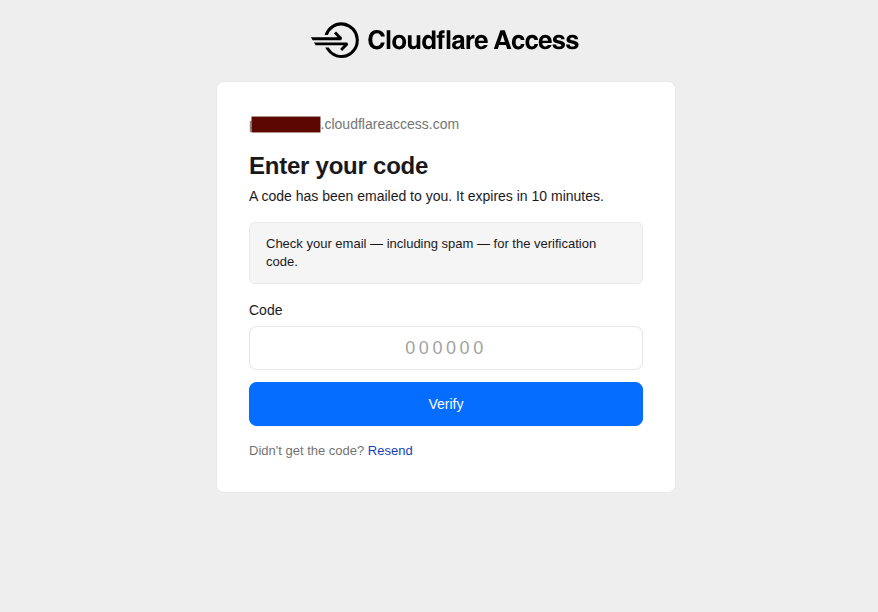
Enter the code and you can access your server remotely!